
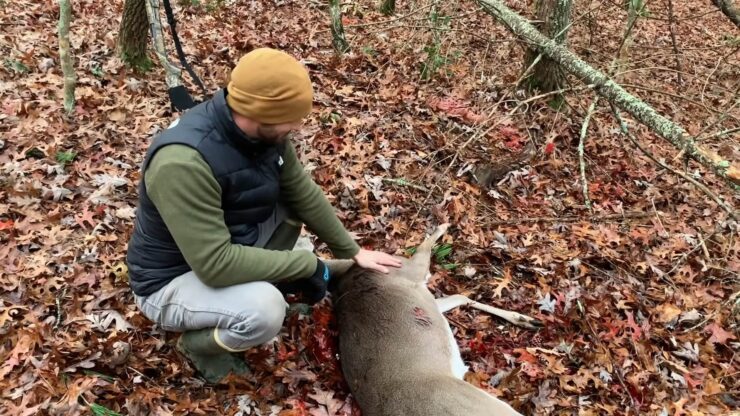
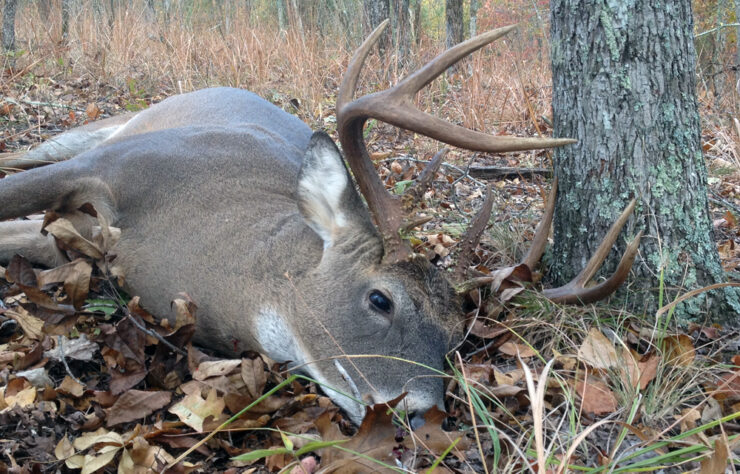
Your persistence has paid off; your deer is down, now what do you do? What you do now will determine the quality of your bucks meat at the table. Proper care of your deer is very important in making sure that its taste good when it is served at the table.
This article is to tell new hunters how to field dress, skin and prepare a deer for butchering. Experienced hunters might also learn something new.
False Hoods
One of the most persistent beliefs among hunters is that you must bleed your deer by cutting the deer’s throat as soon as you get to it. This is suppose to bleed the deer off blood and make the meat taste better. Never cut a deer’s throat. This has no positive effects. Once a deer is dead the heart no longer pumps blood.
If the blood is not circulating then cutting the throat will not bleed any blood from the deer. It can however mess up a cape (the deer’s hide around the head, neck and shoulders) if you decide to mount the deer. It opens the deer’s up to dirt in an area that would otherwise have been protected from dirt and bacteria. It is in a word “USELESS”.
If you want to bleed your deer you will first need to hang the deer (best done head down) and then make a cut at the lowest point so that the blood can gravity feed out of the deer. I don’t do this myself. I get the blood out of the deer after the deer is home via soaking the meat in an icechest for a few days. This has the added benefit of ageing the meat a bit before it is frozen.
Another fallacy is that you must cut off the tarsal glands of the deer or the meat in that area will be ruined. This is nonsense. It didn’t taint the meat while the deer was living and it will not taint it after the deer is dead. You don’t want to touch the tarsal gland and then touch the meat however.
If the animal is not yet dead, simply shoot the animal again. It is very dangerous to approach a buck that is wounded from the front and down right stupid to try to cut its throat with a knife.
FIELD DRESSING A sharp knife is better than a dull knife when it comes to field dressing a buck. A sharp knife will actually reduce bad (unneeded) cuts and will make the entire procedure easier. Take your time when dressing a buck, mistakes due to haste will often require you to make a trip to the hospital to get stitches.
Prop the animal on its back and begin field dressing by making a cut from just above the genitals up to the rib cage. You now have to make a choice. Some people cut through a number of the ribs in the rib cage to make it easier to reach up into the deer’s chest. I find this unnecessary but its up to you.
If you do plan to cut through some of the ribs you should do it of center to avoid the sternum. When you make this cut from just above the genital to the sternum take care not to cut too deep. You only want to cut through the hide and through the animals stomach muscle.
If you go to deep you will puncture the deer’s intestines and you will have to deal with the smell.
NOTE: If you plan on having the deer mounted don’t cut any further up the belly than the sternum to save the cape.
Now turn the deer on its side and allow the guts to fall out. They will require help from you by cutting away the fat that will hold the intestines in. This is usually at the top of the cavity in the area near the spine. Care must be taken to not puncture or break the deer’s bladder.
The bladder will be in the area where the cavity narrows down at the hips. I leave this part of the deer’s intestines intact but many or most do not. If you plan on removing all of this then you must have a very sharp knife and must ream the deer out from the back. Cutting around the anus and tying it off with string.
Then cutting either forwards or backwards from the abdominal cavity to remove this entire area. Easier said than done. Care must be take not to puncture anything here this is where the deer droppings and urine are located.
The deer’s abdominal cavity is separated from the chest cavity by the diaphragm. This separates the lung and heart from the stomach and intestines. This must be cut out to remove all of the intestines.
This is how it usually works for me, with the guts half in and half out I cut the diaphragm away from the deer’s chest cavity, I then reach as far up into the deer’s chest as possible and grab the deer esophagus.
With the other hand I carefully slide the knife into the deer’s chest and work my knife up into the chest to cut the esophagus just above my other hand. After it is cut I simply pull the heart and lungs out and with it comes the rest of the intestines.
- Wash up.
- Drag the deer out.
- Load in truck.
- Go home or to camp for skinning.
Skinning
When skinning a deer it can either be hung head up or head down. I now skin mine head down. But if head up then begin by making a circular cut around the deer’s neck. Connect this cut with the cut made in the stomach during field dressing.
Remove the hide by grasping the skin and pulling down hard with both hands. Use your knife carefully when freeing the hide from the carcass to avoid cutting the skin. If the flesh begins to pull off with the skin, stop pulling and try again after cutting the flesh back with the knife.
NOTE: If the cape is to be saved, you can cut the middle and rear portion of the hide free by starting skinning just behind the shoulder and working down from there.
When you have the hide down around the shoulders you will have to cut off the front legs with a hacksaw just above what you would think is the deer’s knees. Then on the inside of the deer’s legs cut toward the chest and connect this cut with the one made up through the chest and abdomen during gutting.
After you work the hide free around the front legs with a knife. You can continue to work the hide down the deer’s back towards its feet and tail.
Once you get the hide down around the deer’s tail, simply cut the tail off with a knife. Let me say this again. When you are pulling and cutting the hide from the deer and you can see that the hide is now coming off of the tail, you can now simply cut the tail free.
This cut you understand is not through hide but only through the tailbone itself because you have pulled the hide down far enough so that it exposes the tailbone under the hide. That’s a long explanation for something simple just so you will not get confused.
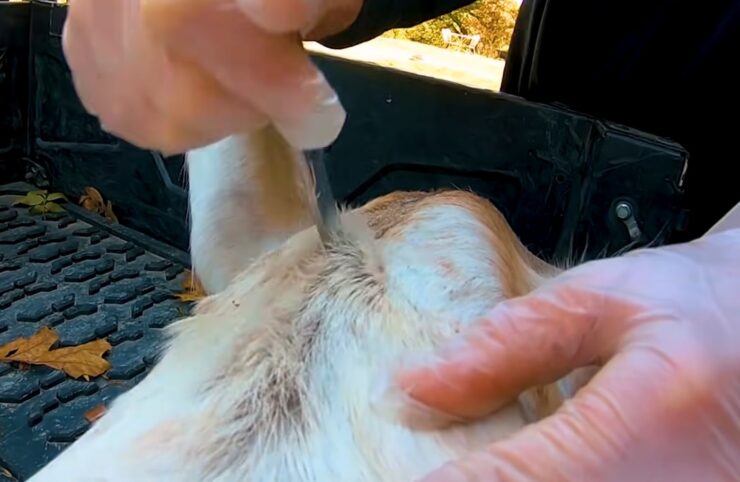
Continue until you get the hide down around the deer’s tarsal glands (the dark patches on the inside of the hind legs) then take a saw and cut through the leg just above the tarsal gland.
By now you are tired from unpacking, driving, getting up early and dragging the deer out of the woods, skinning and gutting. But you are not finished yet. You must still store the meat for butchering. I will not go into great detail at least not today but this is how I do it. I first cut out the backstrap and tenderloins out and place in an ice chest.
Then I cut the front legs free (no bones to cut) and place them in an ice chest. Then I cut the back hindquarters free with a knife. You can works a hindquarter free with just a knife if you work your way to the ball and socket joint that holds the hindquarters to the hips. Just work the point into this joint and work around the ball.
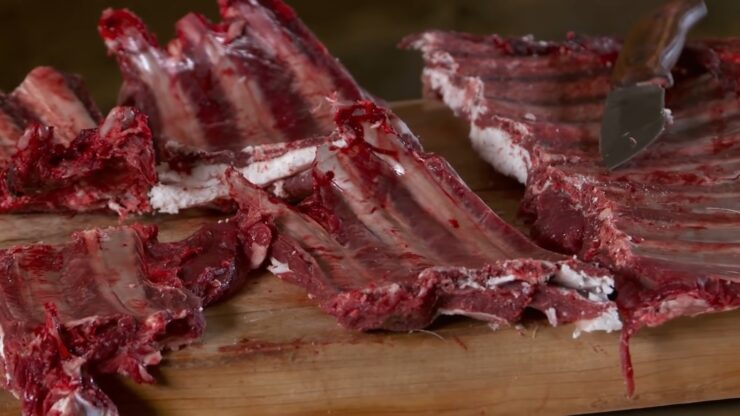
Once both tendons are cut the hindquarter will be free. Place any other meat such as ribs and neck into the icechest. Now place a bunch of ice in the icechest with the meat. I am now totally exhausted from all the work. So I am in no mood to begin butchering the deer. So I usually wait a couple of days before I begin butchering.
Each day you need to drain the water and add new ice. I usually will do a little butchering each day until I am finished, this usually takes me 5 to 7 days. I could do it all in one day if I wanted to but cutting up one hindquarter is easy but butchering an entire deer is work so I spread it out.